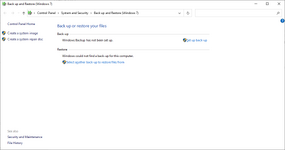
To create a complete backup of your system, we'll use the built-in Windows Backup feature, which, rather confusingly, is known as "Backup and Restore (Windows 7)" in Windows 10.
Please note that the steps may vary slightly depending on your version of Windows, but for the most part, these instructions should work for Windows 7, 8, and 10.
Step 1: Choose the Backup Destination
First, you need to decide where you want to store the backup. You have a few options:
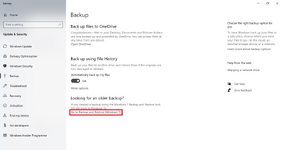
In Windows 10, the Backup and Restore feature is hidden by default but can be accessed. Here's how to do it:
The backup process may take a significant amount of time, depending on the size of your data and the speed of your computer and backup destination. It's best to let the backup run without interruptions.
Step 5: Verify the Backup
After the backup process is complete, it's a good idea to verify that everything was backed up correctly. To do this:
For added security, it's recommended to create regular backups to ensure your data is always up-to-date. You can follow the same steps as above and choose to back up only the files that have changed since the last backup, which will make subsequent backups faster.
That's it! You now have a full backup of your Windows desktop, and your important data is protected in case of hardware failure or other unexpected issues. Remember to store your backup in a safe place and to create regular backups to keep your data current.
Please note that the steps may vary slightly depending on your version of Windows, but for the most part, these instructions should work for Windows 7, 8, and 10.
Step 1: Choose the Backup Destination
First, you need to decide where you want to store the backup. You have a few options:
- External Hard Drive: This is a common and reliable choice. Connect an external hard drive to your computer.
- Network Location: If you have a network-attached storage (NAS) device or another computer on your local network with enough space, you can use it as the backup destination.
- Cloud Storage: If you have a subscription to a cloud storage service like OneDrive, Google Drive, or Dropbox, you can use it as the backup destination. Keep in mind that large backups may require a paid storage plan.
In Windows 10, the Backup and Restore feature is hidden by default but can be accessed. Here's how to do it:
- Go to the Start menu, type "Control Panel," and open it.
- In the Control Panel, change the "View by" option to "Large icons" or "Small icons" to see all the available options.
- Look for "Backup and Restore (Windows 7)" and click on it.
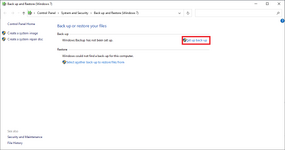
- In the Backup and Restore (Windows 7) window, click on the "Set up backup" button.
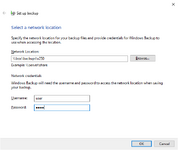
- The "Set up backup" wizard will open. It will ask you to choose the destination for your backup. Select the drive or network location you prepared in Step 1. In this example we are using a network share.
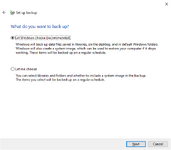
- Click "Next" and then choose whether you want to let Windows choose what to back up or if you want to select specific files and folders. If you want a full system backup, choose "Let me choose."
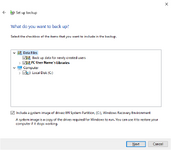
- If you chose "Let me choose," check all the drives (usually C: and possibly others) to include everything in the backup.
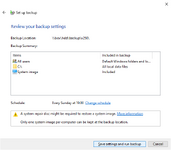
- Click "Next" and review your backup settings. Double-check that you've selected the right destination and all the necessary data for a full backup.
- Click "Save settings and run backup." This will start the backup process.
The backup process may take a significant amount of time, depending on the size of your data and the speed of your computer and backup destination. It's best to let the backup run without interruptions.
Step 5: Verify the Backup
After the backup process is complete, it's a good idea to verify that everything was backed up correctly. To do this:
- Go to the Backup and Restore (Windows 7) window again.
- Under "Restore," click on "Select another backup to restore files from."
- Browse the backup destination and select the backup you just created.
- Browse the contents of the backup to make sure all the important files and folders are there.
For added security, it's recommended to create regular backups to ensure your data is always up-to-date. You can follow the same steps as above and choose to back up only the files that have changed since the last backup, which will make subsequent backups faster.
That's it! You now have a full backup of your Windows desktop, and your important data is protected in case of hardware failure or other unexpected issues. Remember to store your backup in a safe place and to create regular backups to keep your data current.
